Cart 0


Google Analytics, a powerful tool for understanding website traffic and user behavior, is an essential component of any digital marketer’s toolkit. With the advent of Google Analytics 4 (GA4) alongside the existing Universal Analytics (UA), it’s crucial to understand how to effectively use filters in both versions. Filters allow you to refine and segment your data, providing more accurate insights. This comprehensive guide will walk you through the process of managing filters in both Universal Analytics and Google Analytics 4.
Understanding Google Analytics Filters
Filters in Google Analytics are used to include, exclude, or modify the data that appears in your reports. By using filters, you can remove internal traffic, focus on specific segments, or clean up URLs for better readability. The flexibility of filters means you can tailor your data to meet your specific analysis needs.
Types of Filters
There are two main types of filters in Google Analytics:
- Predefined Filters: These are easy-to-use filters for common tasks, like excluding traffic from a specific IP address.
- Custom Filters: These allow for more advanced filtering options, such as including data based on specific patterns or conditions.
Filter Order
The order of filters is crucial as they are applied sequentially. The output of one filter becomes the input for the next. Thus, the order in which you arrange your filters can significantly impact your data.
Managing Filters in Universal Analytics
To manage filters in Universal Analytics, follow these steps:
Step 1: Access Your Admin Panel
Log in to your Google Analytics account and select the property you want to manage. Click on the “Admin” tab at the bottom left corner of the page.
Step 2: Create a New Filter
Under the “Account” column, click on “All Filters.” Then, click on the “+ New Filter” button. You can choose between creating a predefined or custom filter.
Step 3: Configure Your Filter
For a predefined filter, select the filter type and fill in the necessary details. For a custom filter, select a filter type (such as Exclude, Include, Lowercase, Uppercase, etc.), and define the filter pattern.
Step 4: Apply the Filter to a View
After creating your filter, you need to apply it to a view. Go to the “View” column, select the view you want to apply the filter to, and click on “Filters.” Add the filter you created to this view.
Step 5: Verify Your Filter
It’s important to verify your filter to ensure it works as expected. Unfortunately, Universal Analytics doesn’t offer a filter verification tool, so you’ll need to monitor your reports to see the effects.
Managing Filters in Google Analytics 4
 Data Filters in GA4 are tools used to include, exclude, or modify the data that appears in your reports. They are essential for ensuring the accuracy and relevance of the data you analyze.
Types of Data Filters in GA4
- Internal Traffic Filters: These filters exclude or include internal traffic, such as visits from employees or developers, to prevent skewing data.
- Developer Traffic Filters: Specifically for excluding traffic generated during development and testing phases.
- Country Filters: Include or exclude traffic from specific countries.
- IP Address Filters: Filter traffic from certain IP addresses.
- Platform or Device Filters: Filter data based on the device or platform used (e.g., mobile, desktop).
How to Create Data Filters in GA4
- Access Your GA4 Property: Log into your Google Analytics account and select the GA4 property you want to work with.
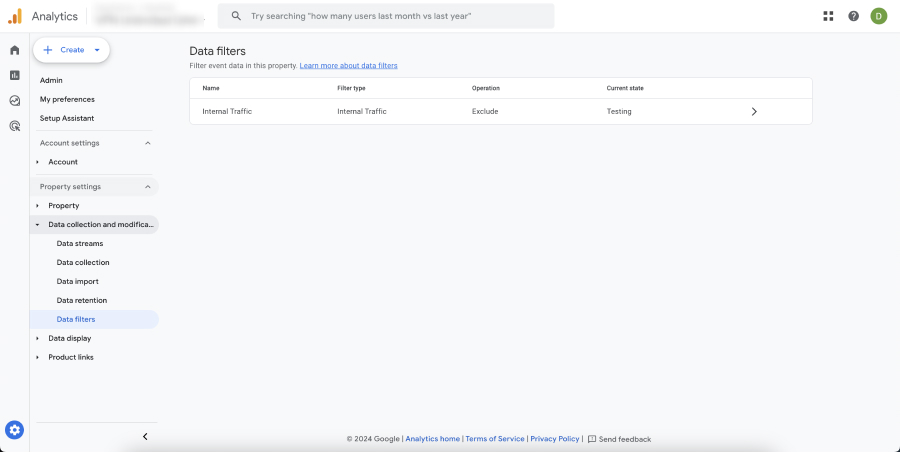
- Navigate to Data Settings: Go to the “Admin” section, find the “Data Filters” and click on “Create data filter”.

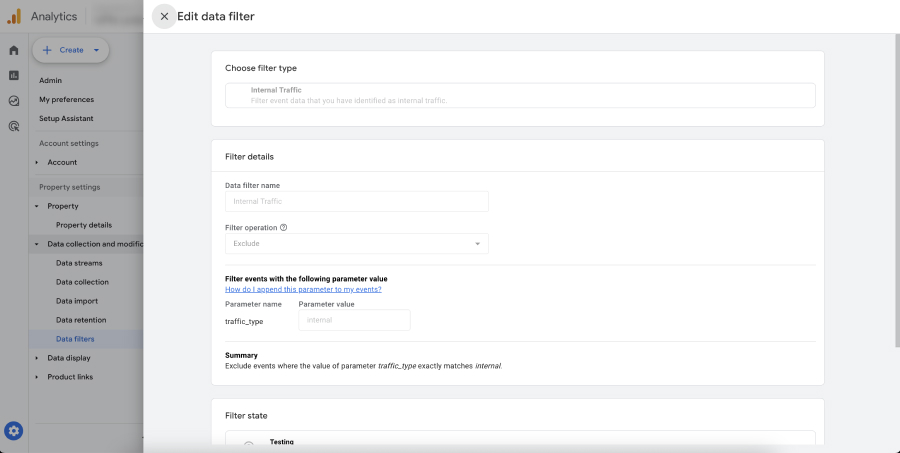
- Choose Filter Type: Select the type of filter you want to create (e.g., internal traffic, country, IP address).
- Configure Filter Settings: Provide the necessary details based on the filter type selected (e.g., IP range, country name).
- Apply Filter to Data Stream: Assign the filter to the relevant data stream.
- Save the Filter: Name your filter for easy identification and save it.
Best Practices for Using Data Filters in GA4
- Test Filters in a Test View: Before applying filters to your main reporting view, test them in a test view to ensure they work as expected.
- Regularly Update Filters: Keep filters up-to-date, especially for IP addresses and internal traffic, which can change over time.
- Document Your Filters: Keep a record of all filters applied, including their purpose and configuration details.
- Use Multiple Filters for Precision: Apply a combination of filters for more precise data segmentation.
- Avoid Over-filtering: Be cautious not to apply too many filters that might exclude relevant data.
- Monitor Filter Impact: Regularly review the impact of filters on your data to ensure they’re providing the intended results.
Conclusion
Filters in Google Analytics, whether in Universal Analytics or Google Analytics 4, are powerful tools for customizing and refining your data. By understanding how to effectively create and manage these filters, you can gain more accurate insights and make better data-driven decisions. Remember to adhere to best practices, such as maintaining an unfiltered view and thoroughly testing your filters, to ensure the integrity of your data.
With these guidelines, you’re well on your way to mastering Google Analytics filters, unlocking new levels of understanding about your website traffic and user behavior.